Easy Needle Felting with Children
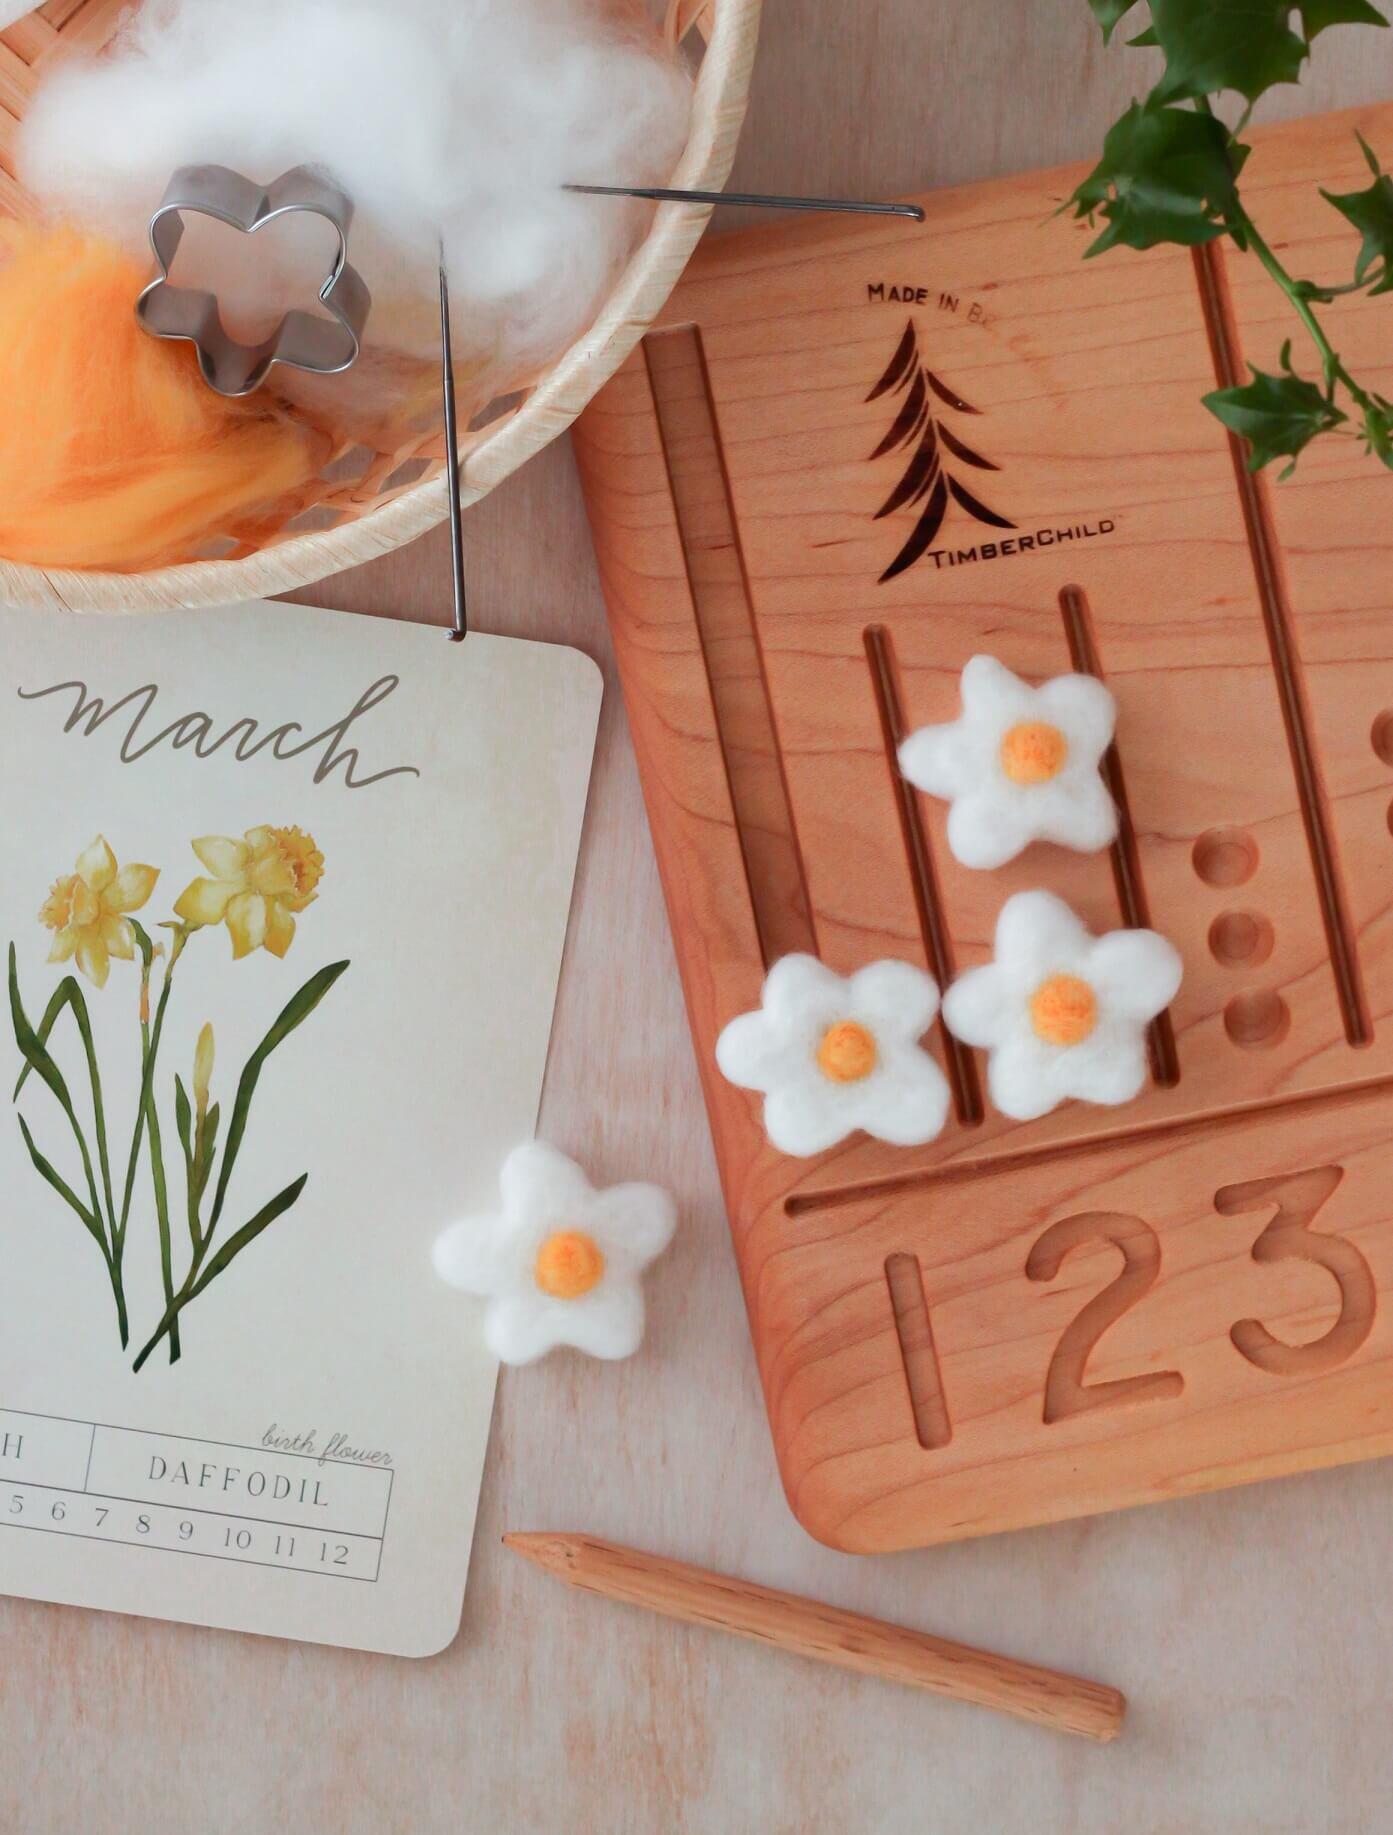
When I first saw a few needle felted items (small animals and foods) I fell IN love. The texture and whimsy that the wool adds is completely enchanting. I knew we had to give needle felting a try but wanted to make sure we could do it safely, as little fingers and needles don’t mix. Felting needles are not like regular needles, they have tiny barbs on one end. When the needle is stabbed into your wool roving, the barbs pull the wool in, but not back out again causing the wool fibers to tangle, lock together and become felted. The more you jab the wool with your needle, the more intertwined it becomes. After doing some research, I saw that many needle felting kits come with finger guards and as an added layer of protection, cookie cutters can be used as guides. Here is a simple needle felting tutorial to help get you started:
Materials
Which includes:
AND
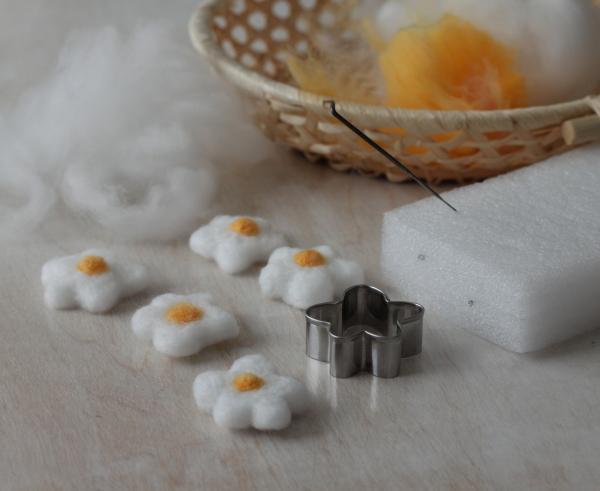
Using cookie cutters as a guide helped us in so many ways.
Little fingers were kept safe and it was easy to create a beautiful shape with little effort.
This minimized frustration in our youngest needle felting artist.

After choosing your cookie cutter and wool colors, place your items on your pad or cushion.
(Use the finger guards as instructed, especially for younger ones)
Take a small amount of wool and place it in the cookie cutter. Fill every nook and cranny with a thin layer.
Hold your needle relatively straight up and down and then begin gently jabbing the wool with your needle repeatedly.
Short, quick jabs are what you are looking for!
If you place the needle at an angle while felting, it will weaken and eventually break.
Your needle should just touch the pad below, it should barely pierce it.
Slowly add more and more wool and continue felting until the desired thickness is achieved.
Flip your project over and repeat on the other side.
Remove your project from the cookie cutter and clean up the stray edges along the sides with the same gentle jabbing motion.
To create a center for your flower, simply freehand a little ball shape and felt it together.
When you have achieved the desired shape, simply place it on the flower and repeat the same needle movements to join the two pieces together.
Voila! Simple needle felted flowers for loose parts play, math manipulatives or to create hair clips or magnets with.
The possibilities are endless!
To see a video tutorial, have a look at the Reels we created HERE on Instagram.
Have you tried needle felting before?
Let me know!
Sue
“We are a participant in the Amazon Services LLC Associates Program,
an affiliate advertising program designed to provide a means for us to
earn fees by linking to Amazon.com and affiliated sites.”
You May Also Like
Pistachio Shell Wheat Grass Craft
Travel Activities for Kids